DWC Hydroponic Setup
UncategorizedThis cannabis DWC hydroponic setup guide will teach you how to grow from seed to harvest using a simple and efficient hydroponic setup that doesn’t take much space. Hydroponics is probably the best way to get bigger plants and consequently better yields while being relatively easier to maintain, so read this grow guide and get growing!
1. What Is Deep Water Culture?
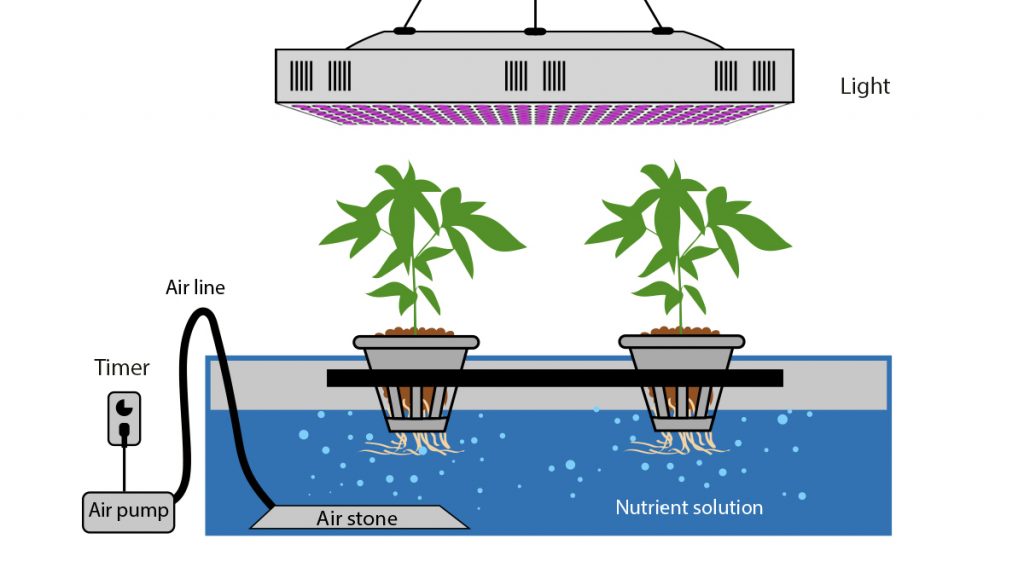
Deep water culture (DWC) hydroponics refers to a soilless method where the roots of the cannabis plants are grown in a reservoir filled with a nutrient solution and air stones that oxygenate the solution. This way, the roots develop in an oxygenated solution, providing access to everything the roots need: water, oxygen and nutrients, and as a result, cannabis usually grows bigger and produces bigger yields in dwc cannabis setups.
A dwc marijuana grow is very similar to bubbleponics but there’s a small difference. Everything works basically the same but in DWC systems cannabis gets fed from the bottom while in Bubbleponics a small plastic tube also top feeds the same solution from the water reservoir, encouraging faster root growth and consequently, faster growth during the vegetative period.
1.1 Pros and Cons of DWC Hydroponics
Just like any other hydro methods, there are pros and cons. Sure, you can get faster growth and better yields but there are a couple of things you should have in mind before moving on to the DWC guide.
Pros of DWC
- Better Yields
Better yields with the same light, nutrients and time.
- Faster Growth
Overall faster plant growth can save you a couple of weeks per cycle.
- Easy to Maintain
Extremely easy to maintain once it’s set up.
Cons of DWC
- Initial Cost
Setting up a dwc hydro system takes more time, money and effort than in coco or soil.
- More Susceptible To Root Rot
It’s easier for the roots to get root rot if you don’t keep everything clean, but this can be easily avoided by taking preventive measures.
- Keep Temperature Under Control
Maintaining good conditions is vital because high temperatures can affect the temperature of the solution, which can affect nutrient absorption.
2. How Do DWC Cannabis Setups Work?
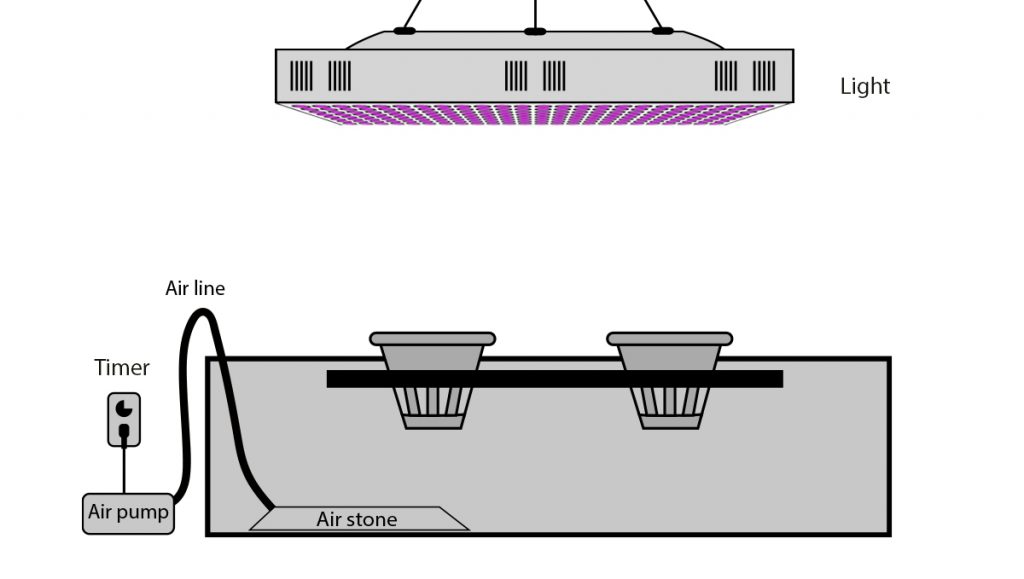
As you can see in the image below, a DWC cannabis setup is quite simple. In short, all you need to do is provide unlimited access to an oxygenated solution and that’s it.Cannabis needs 5 things to grow: light, nutrients, air, nutrients, and a medium. So growing cannabis in hydro is just like in any other way but instead of using a medium such as coco fiber or soil, the nutrient solution is the medium. Another good option is to turn your DWC cannabis setup into a bubbleponics setup by pumping water from the bottom of the reservoir directly to the plant’s roots.
Now, a regular DWC hydroponics works perfectly but taking the extra step to make a bubbleponics setup (basically a top-fed DWC) usually results in much faster growth, especially when comparing it to soil, coco fiber, perlite or any other medium.
It doesn’t matter if you’re growing in DWC or bubbleponics, the roots will drown in just a couple of hours without air stones so you need an airstone running 24/7 and an air pump too if you’re going for a top-fed DWC.
2.1 Grow Space, Lights and Nutrients
Now that you know how a DWC cannabis setup works, there are a couple of things you need to have in mind because cannabis grows a little bit differently than in soil.
2.1.1 Plant Size
In hydroponics you will notice how cannabis grows much taller, and super fast so it’s recommended to have 3 plants or less per DWC setup. Also, have in mind that the more plants in the same reservoir, the smaller the plants so if you want to make the most out of each plant, it’s recommended a maximum of 2-3 per system.
Cannabis also goes through the “flowering stretch” when the flowering stage begins, so another thing to keep in mind is that you want to keep cannabis in the vegetative stage until they are around half of the desired final height, meaning that if you want your plant to reach 150cm, you should switch to flower when the plant is around 70-80cm tall.
2.1.2 Grow Lights
There are several different choices when it comes to cannabis lighting, you can get excellent results with any type of lighting as long as you can provide enough for the plants but there are minor differences between them. In case it’s your first time growing cannabis, here’s a quick rundown of the main lights used.
MH / HPS
Metal Halide and HPS are probably the most used lights by growers and they definitely provide what your plants need to develop healthily but they emit a lot of heat so it may not be the best choice, especially if you don’t have the means to adjust the conditions. This happens because the temperature of the solution plays a huge role in hydro, so if the heat emitted by bulbs is a problem, the best option would be LEDs.
LEDs
LEDs are becoming the most popular alternative amongst growers wanting to upgrade their system. LEDs basically provide the same as bulbs but without emitting much heat and with less wattage consumption so they work great in hydroponic systems although they’re much more expensive than bulbs.
2.1.3 DWC Cannabis Nutrients
3. DWC Cannabis Guide
Now that you know the basics, here’s a quick grow guide on how to make your own DWC system. Remember that this is just a dwc cannabis guide so depending on how you want to build your setup you can modify whatever you need to fit your needs.
DWC Guide: Step 1
Grab a 50-liter plastic reservoir and place the air stones on the bottom. Drill a couple of holes on the sides or near the handles so you can run the tubing through it and you can place the lid properly. At this moment you can also place the pump at the bottom, although it’s not obligatory and won’t affect your DWC cannabis setup if you don’t do it.
Step 1.1
If you decide to go for the bubbleponics system, connect a wider plastic hose to the pump, then a drip manifold to the hose, and finally, 6 thin tubes from the drip manifold, which will later go to each individual plant once the system is finished.
DWC Guide: Step 2
It doesn’t matter if you’re making a bubbleponics or a regular DWC system, once you’ve finished with the first steps in this grow guide, it’s time to place the pots. So grab a couple of net pots, in this case 3, measure the circumference and place the net pots on the lid. If you opted for the bubbleponics system, run the tubes connected to the drip manifold to each individual pot.
DWC Guide: Step 3
Now that everything is ready, it’s just a matter of filling the reservoir with water, plugging everything in and testing if there are any water leaks. If everything is okay, then you can start growing! Remember that you can add perlite or clay pellets to the net pots to provide anchorage to the roots.
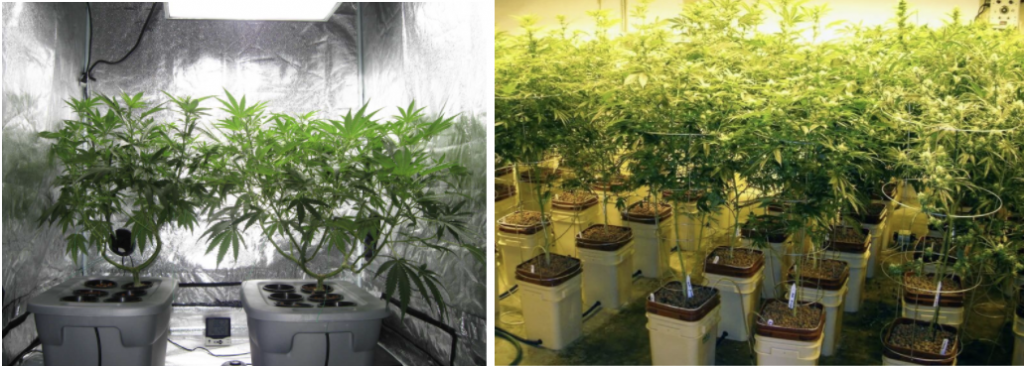
4. Plant Grow Guide In Hydro
Once you get everything ready, it’s just a matter of using this grow guide as a guideline and taking care of the plants. Just when growing in any other setup, the growing conditions should be ideal for each plant stage, so continue reading our dwc cannabis guide and learn what you should check, adjust and maintain daily.
Seedlings and Clones (ideal pH 5.8 – 5.9)
Seedlings and clones are extremely fragile, so the idea is to be very gentle with the feedings, so start with ¼ of the dwc cannabis feeding schedule provided by the manufacturer and gradually increase it when you change the solution in the reservoir which is usually every 7-10 days until harvest.
As for the lights, it’s recommended to have seedlings and clones under a 24/0 light cycle with CFLs because they’re much weaker than LEDs. If you can’t have them under CFLs, you can have them under LEDs or bulbs with an 18/6 light cycle but make sure to dim down the lights until the seedling has come out of the soil.
Vegetative Stage (ideal pH 6.0 – 6.2)
Plants in the vegetative stage need a lot of food and drink a lot of water so you can get closer to the maximum recommended dose if needed, but always keep in mind that you can end up causing nutrient burn so increase the nutrient dose gradually. If you started under CFLs, make sure to change it for the light bulbs or LEDs, set them at 18/6 until you’re ready to trigger flowering, and make sure to increase the light intensity.
Flowering Stage (ideal pH 6.0 – 6.3)
Once you’re ready for the flowering stage, change the light cycle to 12/12 to trigger flowering and increase the light intensity. The flowering stage is the last stage of plant growth so never forget to continue changing the solution weekly to avoid root rot and algae. As for the nutrients, continue following the feeding schedule but start feeding Bloom nutrients, always keeping in mind that feeding excessively may affect bud production.
Just remember that this is just a dwc cannabis guide and plant care will vary depending on the growing conditions!